Replacing the LCD screen of a laptop may seem like a daunting or expensive endeavor, but for some Macintosh models it is relatively easy and inexpensive. It could save you a lot of money, by not replacing the whole laptop.
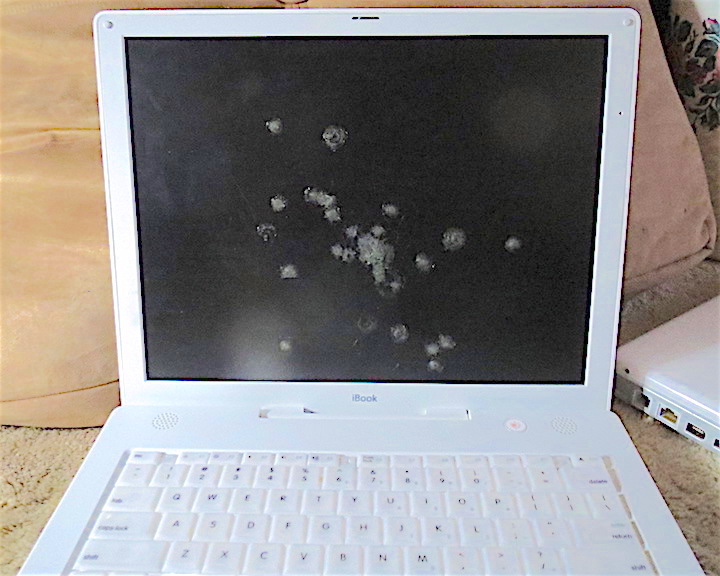
I bought a set of two iBooks and an iPad that all had display issues. One of the iBooks looked like someone had taken an ice pick to the screen. The iBook powered on, chimed and seemed to go through the boot process, so I decided to take a chance that it was in good working condition and only needed the screen to be replaced. I found a replacement screen for about $13.

I had never replaced the screen on a laptop before, so this was an entirely new experience for me.
- Remove the outside cover
- Remove the metal shielding
- Disconnect the LCD display screen and remove it from the laptop
- The LCD Display Cable
- The CCFL Inverter
- Connect the new LCD screen.
- Put the shielding back around the the screen.
- Reattach the rear cover
There four small hex screws that holds the outer plastic cover to the screen. Remove each of the four screws.
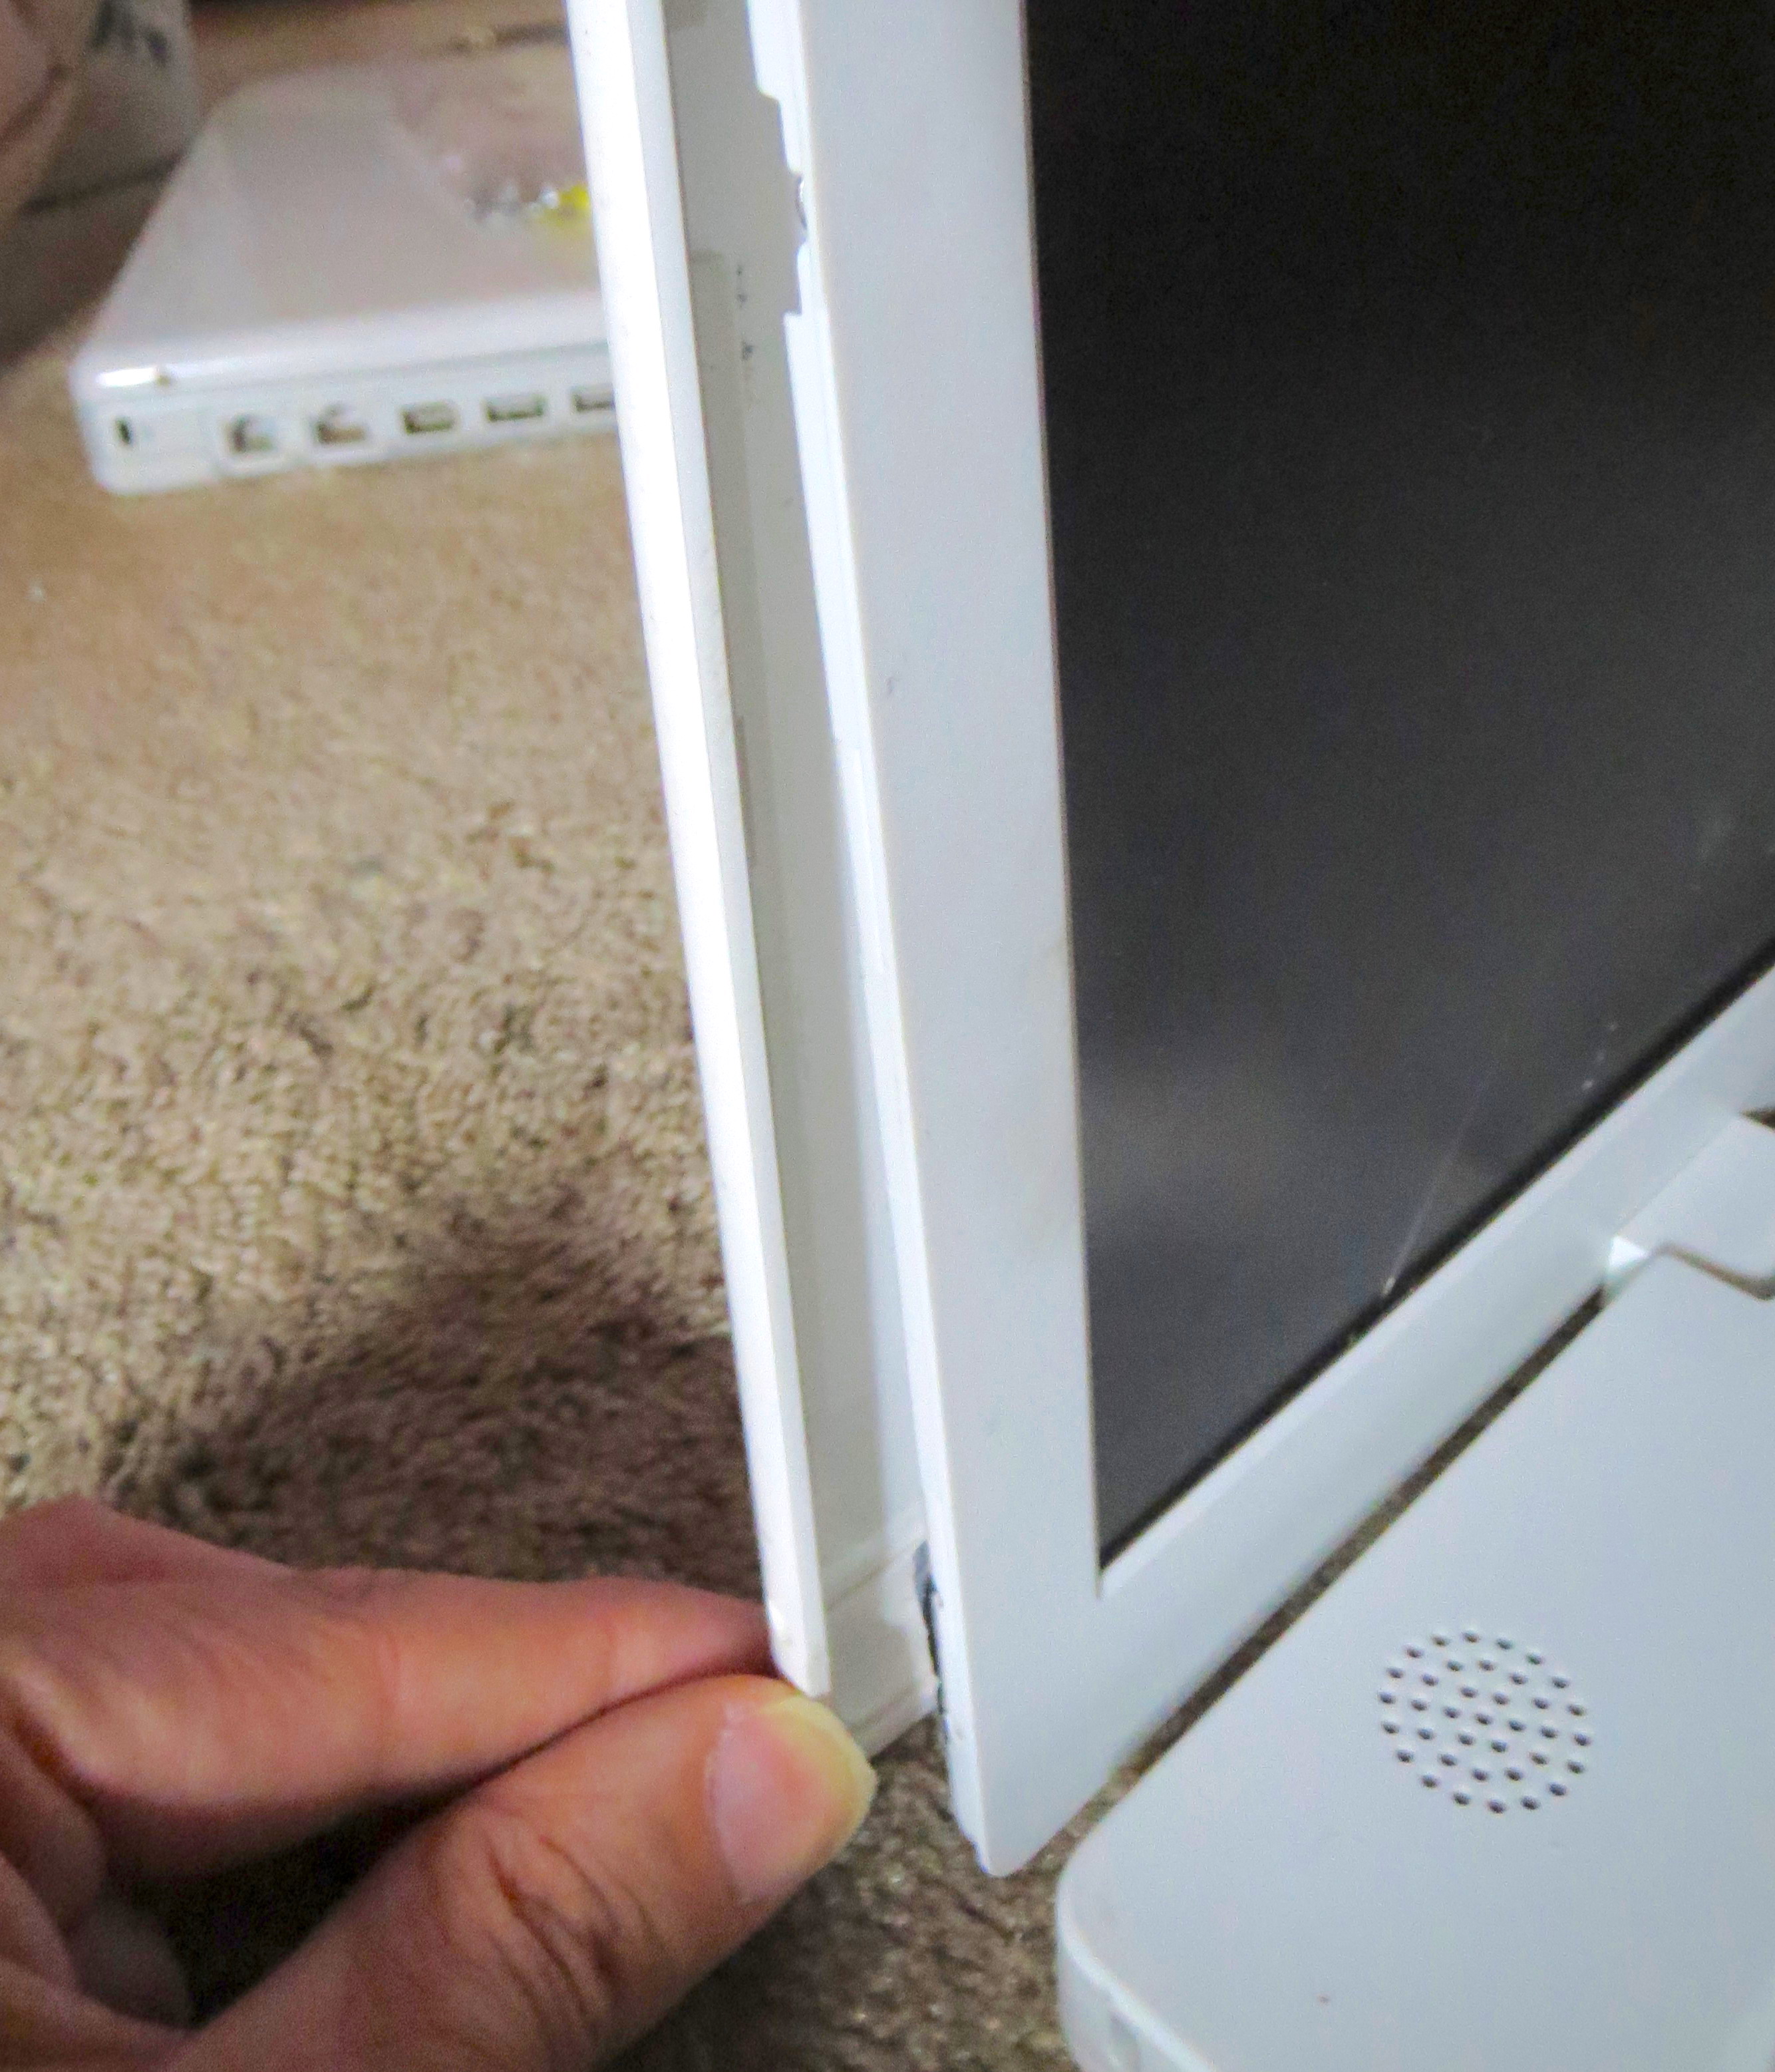
The front bezel snaps into the outer cover. With your thumbs, push the outer cover away from the front. Once you get it started, it is easy to pull them apart.
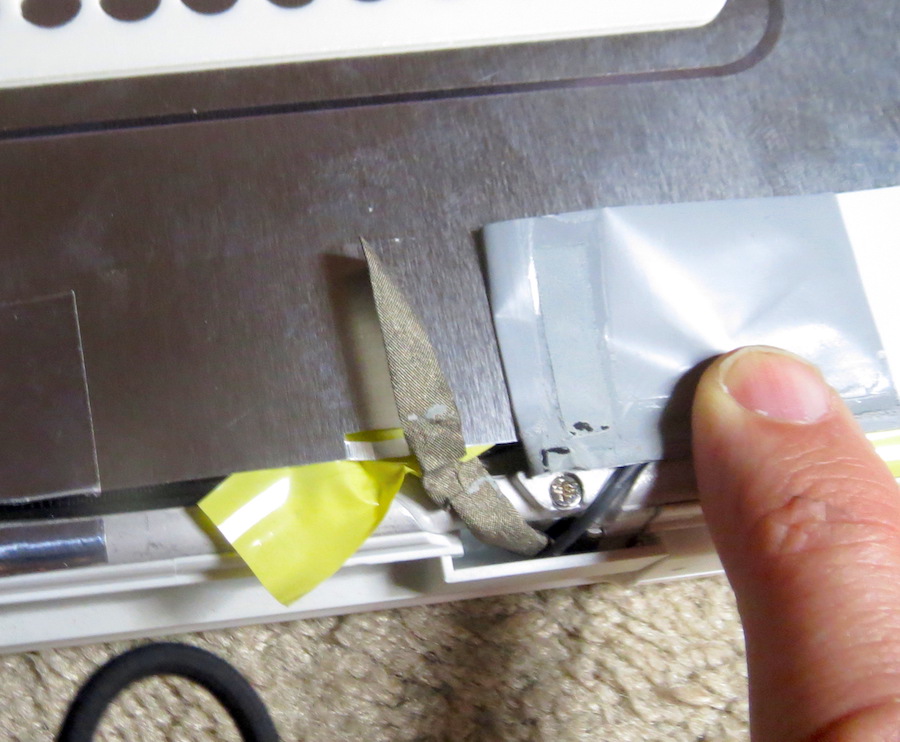
There are four small Phillips screws that holds the shielding to the screen. It is only necessary to remove these four screws. The other screws are part of the screen assembly and should not be remove. The correct screws to remove are marked by a half-circle indention on the sides of the front bezel. See the picture below for locating the screws to remove.

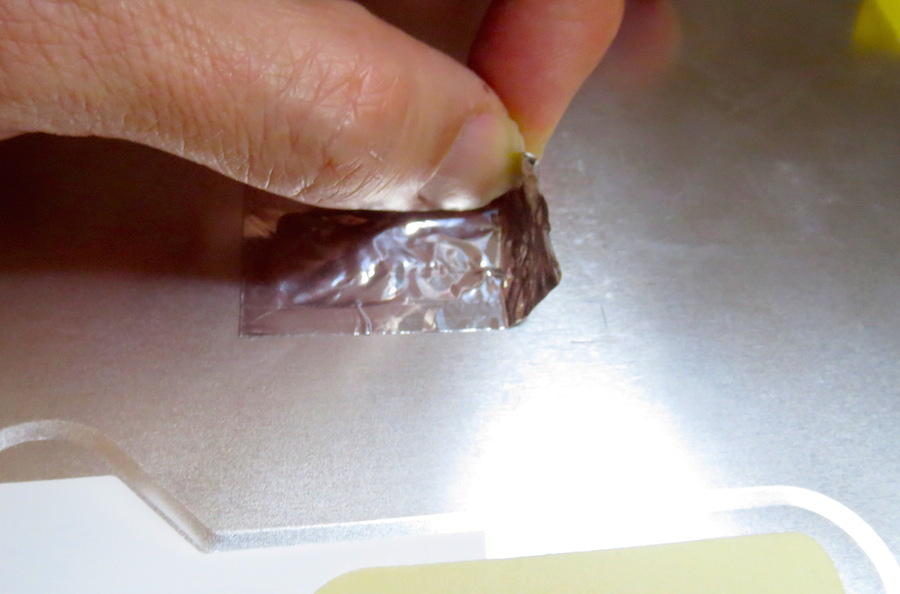
After the screws are removed, the shield cannot be lifted off yet. The inner side of the shielding has a spot with very sticky tape that holds the display cable in the display connector. Slowly peal back the tape off the display ribbon connector. Hold down the shielding around the tape to prevent bending the shielding. At the bottom center of the shield there is some tape that holds the lower portion of the display cable stationary, by taping down a strip connected to the cable. When you remove the tape, pay attention to how to how it is taped down, so it can be put back in place, during reassembly. The shielding is easily bent and once it is bent, it can be difficult to get it back in shape that will fit over the screen an inside the bezel. So, take care whenever handling the metal shielding. Also, pay attention to the orientation of the shielding.
Once the shielding has been removed, you will have access to the two connector between the screen and the laptop:
The images are sent to the LCD screen by way of the display cable.
The images are illuminated by the CCFL lamp in the LCD and powered by AC provided by the inverter. If you have an LCD screen where you can see faint images on a dark screen, there is probably an issue with the inverter or the lamp.
The display cable was held into place by the sticky tape on the inside of the shielding. The connector is not a locking connector, so it is very easy to slide the cable out of the connector.

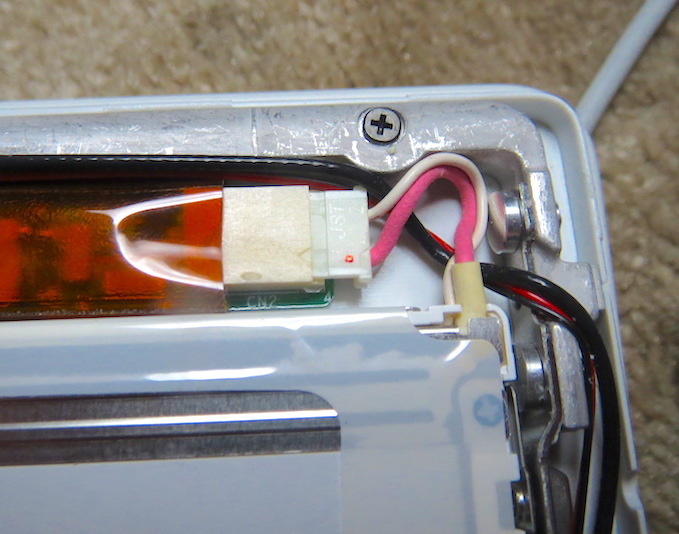
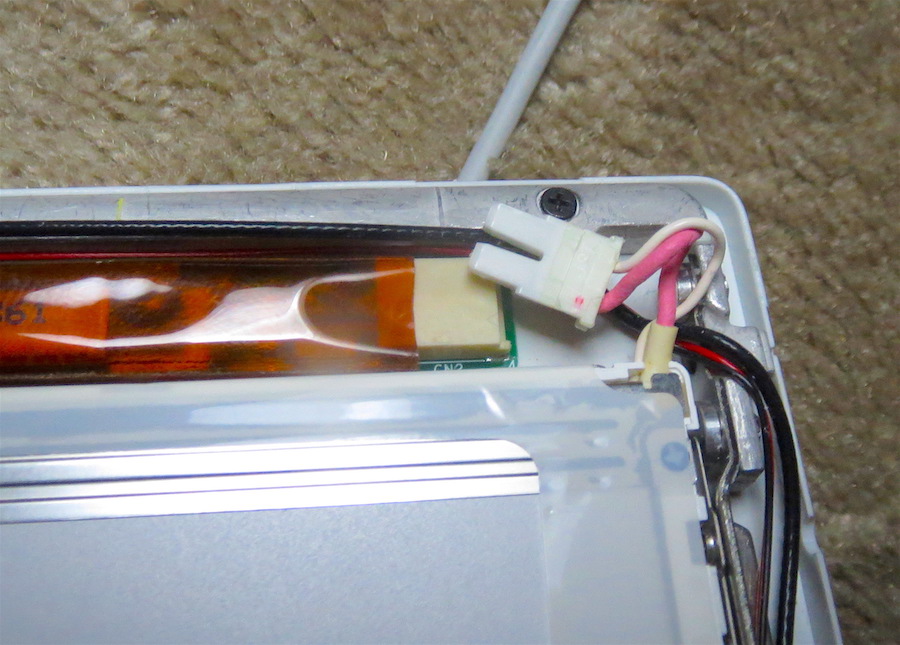
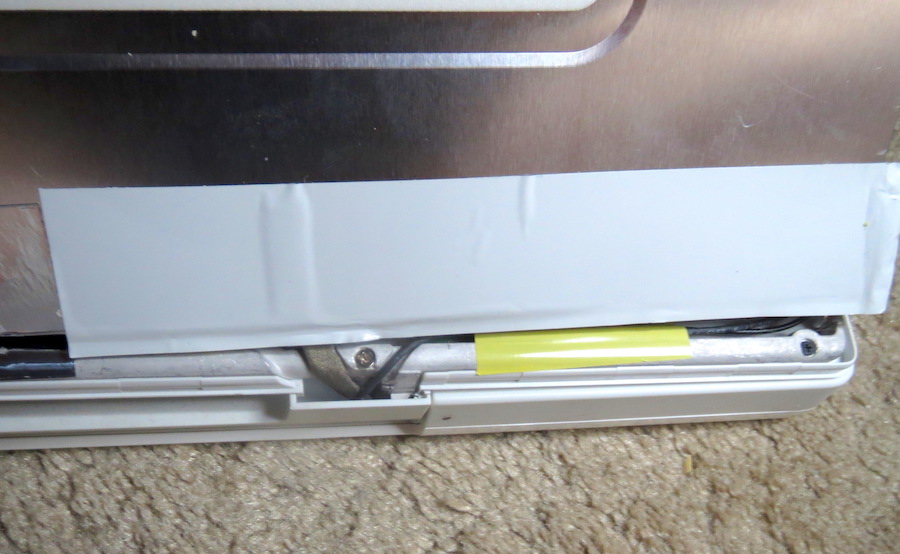
The inverter connector might be a bit more difficult to reach. It is located at the bottom left of the back of the laptop screen. You may need to remove some tape to uncover the inverter. If you do remove some tape, keep it an remember to put it back into place, during reassembly. Carefully, pull the inverter connection apart. Once the screen is disconnected, it can be removed and placed in hazardous waste recycling.
Place the new screen in the front bezel. The replacement screen I purchased had slot for the display cable to slide under to help keep it on place. I still put piece of tape on the display cable just below the slot. Slide the cable into the connector. Connect the inverter and put the tape that may have been removed back in place. When placing tape on the back of the LCD screen, take care to not put any tape in the middle of the screen, otherwise you will create an unwanted shadow on the Apple logo.
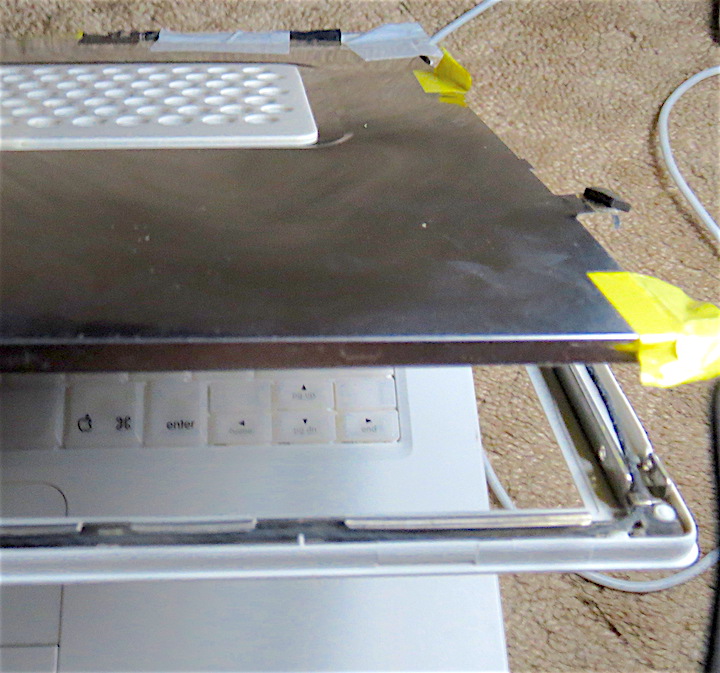
It might be easier get the shielding into place, if the top part of the screen is lifted away from the bezel. This way you won't need to try to push the edges of the shielding between the screen an the bezel, which may be more likely to bend the edges of the bezel. With the screen pushed up away from the bezel, place the shielding over the screen. All the long strips of tape on the shielding should be oriented towards the bottom of the screen.
Thread the tab attached to the bottom of the display cable through the slit and replace the tape to hold it in place. Once the shielding is in place around the LCD screen, it can be carefully placed in the bezel and screwed to the LCD.
Make sure the cover is oriented correctly and snap the bezel into the cover. Press all around to ensure that it is securely in place. Screw in the four hex screws into the cover and you have finished reassembling the iBook with its new screen.

Boot up your iBook and enjoy the second life you have given it for only $13 and a little bit of your time.