68K and PPC Emulation on Intel
Running Vintage Applications on an Intel Macintosh
by Roger Gibby, May 17, 2016
I have been thinking about my past recently and I started reminiscing about my early days of computing, with my first Mac. I had written a few programs with Aztec C on an upgraded Mac 512K. I no longer have the compiled program, but I still have a dot-matrix printout of the C source code and resources, which meant that I could enter the source code, define the resources and compile it, but I needed a compiler to compile with the original Mac ROM. I no longer had any vintage Macs or software, so I looked for a software solution that would allow me to recompile the program on my current Intel Macintosh.
In the past, running non-native software, such as Windows applications on a Macintosh, had its performance trade-offs. Hardware solutions, such as expansion cards, including the CPU and memory necessary to run the non-native OS and application was expensive, but offered the best performance. Hardware emulation with just software was historically a poor performer. However, advances in hardware and OS software available today has made hardware emulation software, or otherwise known as virtualization software, the more common option. VMWare Fusion and Parallels Desktop are two software packages that offer hardware virtualization, or virtual machines (VM). This website is not running on a dedicated physical server, but in a virtual server on the same physical machine with other virtual servers. Virtualization has progressed to the point of allowing non-native and native software to run side-by-side.
This may be great for running Windows software on a Macintosh, but what about vintage CPUs that Apple has long ago abandoned for the Intel processor? You could always buy a vintage Macintosh on eBay, but there are challenges with getting data to and from a legacy Mac, hard drives are SCSI, 800K floppy drives can't read 1.4M disks (and vice-a-versa), LocalTalk instead of Ethernet, etc. Of course, the older the model of Macintosh, the greater these challenges become. They are not insurmountable and will be discussed in other articles.
If one wants to run the old software and not have to deal with old the outdated hardware, there are several emulation options available to the vintage Macintosh enthusiast.
- Mini vMac
- Basilisk
- SheepShaver
Each these emulators, emulate different CPUs. You may need all three emulators depending on what software you will be running. Each emulator is not necessarily mutually exclusive.
There are benefits to using an emulator. The emulators run extremely fast. Not only are modern computers faster, but the original Macs relied on floppy disks as the sole means of storage. Virtual floppy disks on the hard drive is very fast and you can mount as many as you want, so no more floppy disk shuffle, swapping program and data disks.
Prerequisites
There are two prerequisites to running legacy Mac applications in any emulator:
- Mac ROM file for the appropriate emulated hardware
- A licensed copy of the Mac OS version that can run in the emulator
Due to copyright restrictions, Macintosh hardware emulator software can only emulate the hardware, but not any copyrighted software contained in any of that hardware. This means that the Macintosh ROM is not included in the emulation software, but is required to run the Mac OS.
For license reasons, you should own the Macintosh for the corresponding ROM file. CopyRoms is one utility that can extract the ROM code from a vintage Mac and save it as a file, for use with the appropriate corresponding emulator. There are places where you can download a Mac Plus ROM file, but, of course, this is in violation of copyright laws.
Extracting the ROM from a Mac Plus poses the same challenge as using a vintage Mac, how to get a file onto and off a Mac Plus. This is a onetime operation and once it is done, you won't have to manually transfers files between physical computers.
- Floppy Disks
- Networked Macs
- SCSI External Hard Drive
- Zip Drives
The Mac Plus can only read 400K and 800K floppy disks. More modern Macs can only read 1.44M HD floppy disks, which includes external USB floppy drives. This has to do with the mechanics of the two drives being very different.
Older Macs use LocalTalk and modern Macs use Ethernet. Each use an entirely different protocol, but it is possible to bridge the two. In order to network the two together, it requires either a hardware or software bridge to translate protocols between LocalTalk and Ethernet. The software bridge requires software free from Apple and a PowerPC with serial and Ethernet ports. The hardware option requires a LocalTalk Ethernet Bridge, like the AsanteTalk bridge. This is probably not a viable option for most people.
Although, the Mac Plus can attach SCSI drives, modern Macs no longer have a SCSI interface. One can use a SCSI to Firewire adapter to mount the drive on non-SCSI Macs. I bought a SCSI to Firewire adapter back when Apple switched from SCSI to IDE drives. This might be a good option if you have external SCSI drives and an older Mac that has Ethernet and supports SCSI devices.
At one time Zip drives were very popular and were produced with several different interfaces, including SCSI and USB. I have quite a few of old SCSI Zip drives and I bought a USB Zip drive for cheap on eBay. Zip drives are readily available. Files could be transfered from one computer to the next via a Zip disk. This is the option is probably to most accessible to most people.
The second prerequisite is a licensed copy of the Mac OS. If you are a long time Macintosh user, you probably have old system software disks lying around. If not, Apple Computer has a full install of System 7.5.3 available as a free download. The 7.5.5 system update can also be downloaded and applied.
Mini vMac |
 |
|
www.gryphel.com |
||
| Emulated Archetecture | Macintosh Plus - Motorola 68000 | |
| Supported Mac OS | Earliest System software through 7.5.5 | |
| Data Exchange | Disk images and custom programs | |
| Configuration | Static Mac Plus configuration | |
| Setup Instructions | Getting started with Mini vMac | |
The goal of the Gryphel Project is to preserve early Macintosh software, from the Macintosh's first ten years. Towards that goal, the Gryphel Project's Mini vMac emulates the Motorola 68000 of a Macintosh Plus, which is available on several platforms.
The Mac Plus was chosen because it is the most advanced computer of the early Macs that used the original 68000 CPU. The Mac Plus ROM supports up to 4MB of RAM, with support for 800K floppy disks and SCSI.
Mini vMac doesn't offer any runtime configuration of the emulated environment. In order to change the configuration, you would have to compile Mini vMac with the appropriate option changes. Their website has a page where you can select the desired options and request a custom build. You can also download the source code and compile it yourself.
It is quick and easy to get up and running with Mini vMac. They have detailed instructions with lots of images to guide you through the process.
When launching Mini vMac, the disk icon appears just as you would see, when starting a Macintosh Plus. Opening disk images emulates inserting a disk into the drive. Mini vMac works entirely from disk images. There are blank disk images of various sizes that can be mounted to create your own disk images or store data. Up to six disks can be loaded at one time in the emulator. In addition to the floppy empty images, there are hard disk blank images. I mounted a 20 MB image to contain my applications and data.
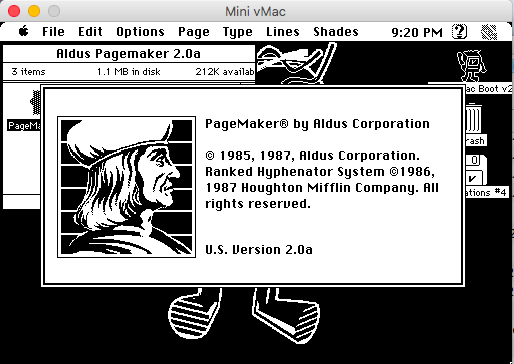
Available on the Gryphel Project website is a library of utility disk images to be used with Mini vMac. These utility programs are used to import and export clipboard or file data, among other things. There are links to sites that have disk images of software that are ready to use with Mini vMac. In the above image, Aldus Pagemaker 2.0 running in the Mini vMac emulator, from the mounted "Applications #4" disk downloaded from Mini vMac Applications.
Basilisk II |
 |
|
basilisk.cebix.net |
||
| Emulated Archetecture | Quadra and Mac IIci - Motorola 68020, 68030 and 68040, with and without FPU. | |
| Supported Mac OS | Mac Classic: System 0.x - 7.5, Mac II series: System 7.x, and MacOS 8.0 and 8.1, depending on the ROM file being used. | |
| Data Exchange | Common folder | |
| Configuration | Configuration through a user interface | |
SheepShaver |
 |
|
sheepshaver.cebix.net |
||
| Eumulated Archetecture | Motorola PowerPC | |
| Supported Mac OS | Mac OS 7.5.2 through 9.0.4 | |
| Data Exchange | Common folder | |
Both Basilisk II and SheepShaver are sister projects that have a common structure. As with other Mac emulators, Basilisk and SheepShaver require an appropriate ROM file and MacOS. The Performa.rom file works well with both emulators.
The Basilisk II emulator is configured and launched through a separate program. The SheepShaver emulator is configured and launched through a preference panel in SheepShaver.


It is a little more involved to get Basilisk or SheepShaver up and running. E-Maculation has a setup guide that walks through getting Basilisk II running with System 7.5.3.
Installing from an MacOS install CD is simpler than installing from a non-bootable disk. If installing from a non-bootable, such as installing System 7.5.3 from the download installer program, a bootable disk image will be required and a tempory hard disk will need to be created to have the the installer files available to the OS in the emulator.
- An empty virtual drive to install MacOS and applications
- A boot image
- Read/Write
- No Compression
- Custom Size: 400MB
- MacOS Install files
- A temporary hard disk image
This will emulate an internal hard drive and will become the new boot drive with OS, applications and data. This drive is defined in the emulator configuration. A drive for the emulated machine can be defined on the Volumes tab, clicking the Add button. The drive size is user definable. I made my drive 1 GB.
In order to install MacOS on the empty drive, a bootable image is required to boot up the emulator. This can be an image of an installer CD or an image of the a System 7 or MacOS 8 bootable disk. Bootable disk images can be created with Disk Copy from Apple. When creating an image of an install CD, there are a few things to keep in mind. Normally, you aren't able to install from a copy of the install disk. But if you do these few things, there shouldn't be any problems creating a bootable image of an install CD.
I did these things when creating an image of a MacOS 8.1 install CD that I still had around.
After creating the image file, lock the file. This will mimic the read-only nature of the CD ROM. Creating the image as a read-only image did not work for me, but locking the file did.
If the boot image does not have the MacOS install files, a MacOS installer with supporting files is needed. System 7.5.3 can be downloaded from Apple (see links at bottom). Once downloaded, the files should be decompressed and placed in the shared folder. The location of the shared folder is defined in the emulator configuration. The shared folder facilitates transferring files between the host computer and the emulated machine.
If booting from an install CD image, this is all that would be needed.
When installing the MacOS via files in the shared folder, another disk needs to be created for the install files. The shared folder only facilitates exchanging files between the host and emulated systems. Once the emulator is started and boots off the boot image, the install disks images need to be copied to this temporary drive.
Once the MacOS has been installed on the virtual disk, shutdown the emulator, and remove the boot disk and the temporary disk that has the installer files. Theses disk are no longer needed and you can now boot of the virtual. To install applications, copy compressed or encoded files from the host computer to the shared folder. In the emulator the files can be copied from the shared directory to the virtual disk and decompressed.
SheepShaver is configured through a preference dialog.
© 2016 by Roger Gibby. Apple logo is trademarked by Apple Inc.