Laptop display issues are not always resolved by replacing replacing the LCD screen. An LCD screen that remains dark, doesn't indicate that the LCD needs to be replace. There are several components that could be at fault here, the LCD, the inverter, or the backlight, and how do we troubleshoot which one is failing?
After booting up an iBook, the screen remains dark. There is a faint image of the desktop on the screen and the desktop can also be seen, through an external monitor. To better determine if there are images on the screen, light from a flashlight can be used to provide some illumination to the screen images. If images can be seen, then data is being sent to the display. The problem lies with the backlight or the inverter.
The CCFL lamp illuminates the LCD display and the CCFL inverter provides AC power to the lamp. There are a couple of ways to determine whether it is the inverter or the lamp that is the failing part.
Removing the LCD screen outer cover
Both ways of determining which part is failing requires getting to the inverter connection to the LCD screen. Follow the following steps, to access the inverter connection:
- Remove the four outer case screws
- Remove the outer case
- Disconnect the inverter from the laptop LCD
To gain access to the inverter connection, remove the four screws holding the outer case to the back of the LCD
Push the outer case away from the front bezel with your thumbs and remove.
The inverter connection is located at the bottom left. Disconnect the cable and examine the cable for any damage to the cable that may cause a short that would trigger the fuse to blow. If there is damage to suspect a blown fuse, stop here and test the fuse. If not, then continue.
Test CCFL Lamp and Inverter
Once you have the cover off the back of the LCD, the steps diverge here, depending on the method being used to test whether it is lamp or the inverter.
- Use another working LCD
- Connect the working LCD to the laptop inverter and test
- Use a test inverter
- Disconnect the laptop LCD from the inverter
- Connect the external inverter to the laptop LCD
- Power on the inverter and test the screen
If an extra working LCD display is available, it would be a simple matter of connecting the inverter in the laptop to the working LCD. There is no need to remove the display from the laptop, but simply disconnect the LCD display from the inverter and plug in the working LCD to the inverter.
Connect the working LCD to the laptop inverter and power on the laptop with it connected with the power adapter. The desktop images will not show on the LCD, as the data cable was not connected to the LCD. What we are looking for is whether the LCD screen illuminates or not. If the screen remains dark, it is the inverter or inverter fuse. If it lights up, then it is the CCFL lamp that is out.
An external CCFL lamp tester is fairly inexpensive. It is basically an inverter with an external power supply.
Perform the above steps (1, 2 and 3) to gain access to the laptop inverter connection and disconnect the LCD.
Below is an image of the CCFL lamp tester that I acquired for less than ten dollars. One end is a connector for the 12V power adapter. The other end has clip connectors, to attach the appropriate inverter connector for the iBook CCFL lamp. With the power to the lamp tester disconnected, connect the inverter to the laptop screen.

Plug in the power adapter for the inverter and see if the screen lights up. If it remains dark, then it is the CCFL lamp. If LCD lights up, it is the inverter that is bad or has a blown fuse.

This is what the screen will look like with a good CFL lamp in the LCD. This means that it is either a blown fuse or the inverter board is bad.
Replace the Blown CCFL Lamp
If the CCFL backlight lamp is out, the CCFL lamp can be replaced in the bottom of the LCD screen. Since this iBook is over seven years old, the LCD replacement screens are very inexpensive and probably not worth the bother to replace just the lamp in the LCD screen. Replacing the lamp is a little bit more work than replacing the LCD screen, and involves desoldering a wire from the LCD. So, if it is cost effective to replace the whole LCD screen, it will save you some time and effort. Especially, if you are unsure about using a soldering iron.
For instructions on replacing the LCD screen, please see this article: Replacing a Damaged iBook Screen
Replace the Bad Inverter
Replacing the inverter is just a little more work than replacing the LCD, as the LCD must be removed to get to the inverter.
Perform the above steps to remove the LCD screen back cover and then follow these steps to to remove the LCD screen and replace the CCFL inverter:
- Remove the metal shielding
- Disconnect the LCD display screen and remove it from the laptop
- Remove the CCFL inverter
- Install the new CCFL inverter
- Adhere the inverter board to the screen bezel.
- Connect both connectors on the inverter board.
- Reattach the shielding to the back of the LCD.
- Reattach the screen cover
There are four small Phillips screws that holds the shielding to the screen. It is only necessary to remove these four screws. The other screws are part of the screen assembly and should not be remove. The correct screws to remove are marked by a half-circle indention on the sides of the front bezel. See the picture below for locating the screws to remove.

After the screws are removed, the shield cannot be lifted off yet. The inner side of the shielding has a spot with very sticky tape that holds the display cable in the display connector. The shield should be carefully separated from the back of the screen and the display cable. At the bottom center of the shield there is some tape that holds the lower portion of the display cable stationary, by taping down a strip connected to the cable and threaded through a hole in the shielding. When you remove the tape, pay attention to how to how it is taped down, so it can be put back in place, during reassembly. The shielding is easily bent and once it is bent, it can be difficult to get it back in shape that will fit over the screen an inside the bezel. So, take care whenever handling the metal shielding. Also, pay attention to the orientation of the shielding.
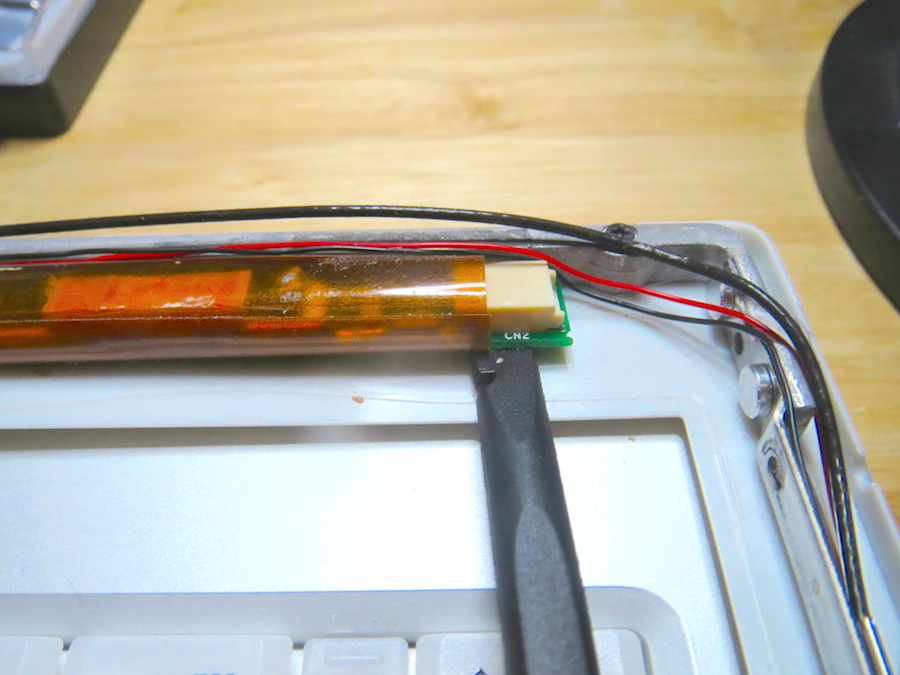
Once the shielding has been removed, you will have access to the two connector between the screen and the laptop:
The display cable was held into place by the sticky tape on the inside of the shielding. The connector is not a locking connector, so it is very easy to slide the cable out of the connector.

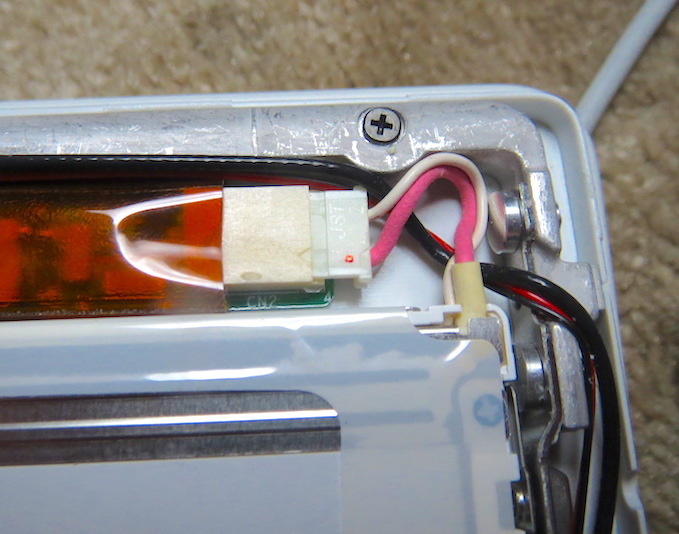
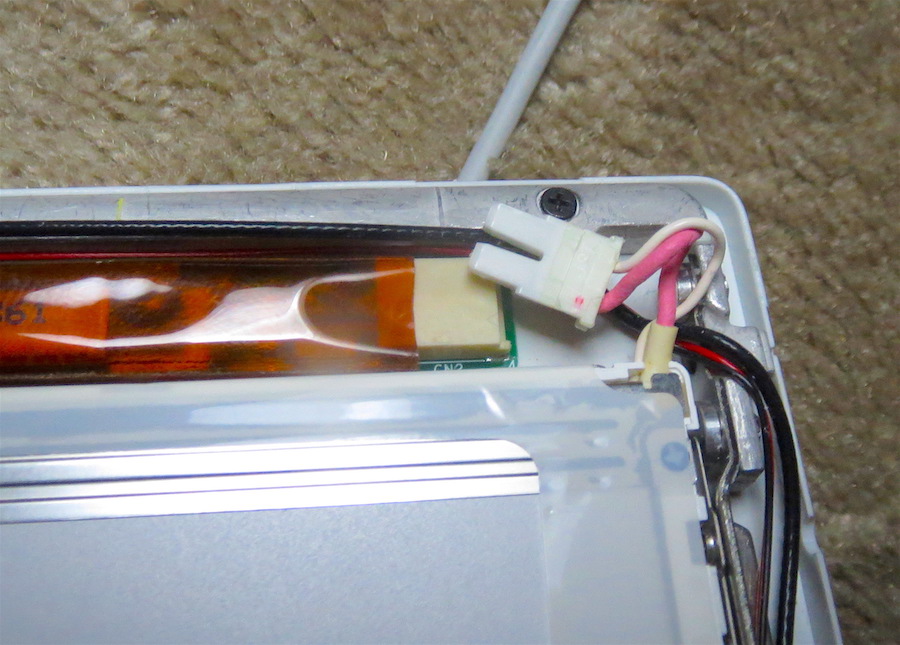
The inverter connector might be a bit more difficult to reach. It is located at the bottom left of the back of the laptop screen. You may need to remove some tape to uncover the inverter. If you do remove some tape, keep it an remember to put it back into place, during reassembly. Carefully, pull the inverter connection apart. Once the screen is disconnected, it can be removed and set aside.
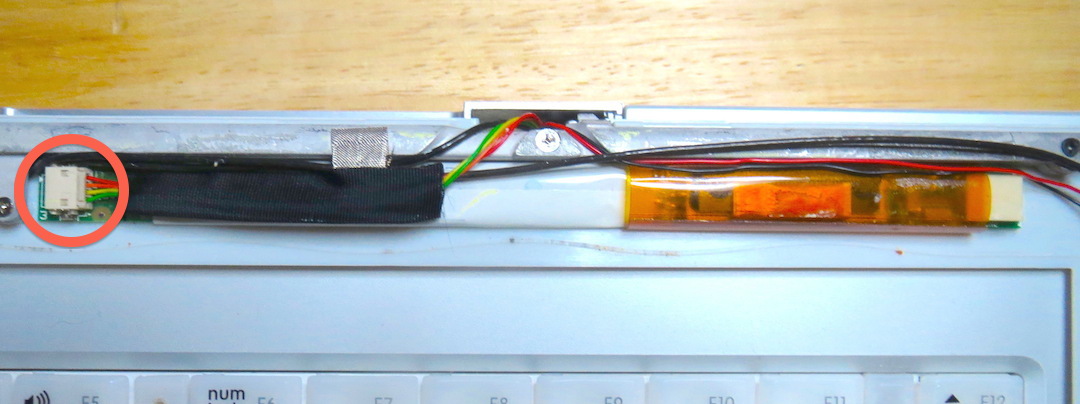
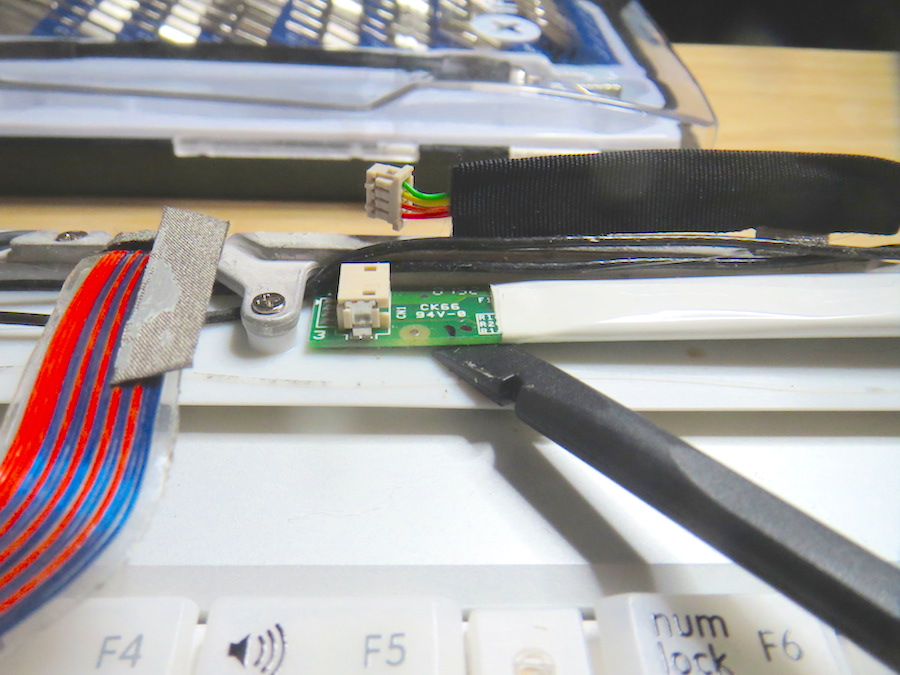
Remove the tape holding inverter and the cables in place. To remove the LCD screen, one of the connectors on the inverter board has already been removed. There is another connector on the other side of the board that needs to be disconnected, before the inverter board can be removed.
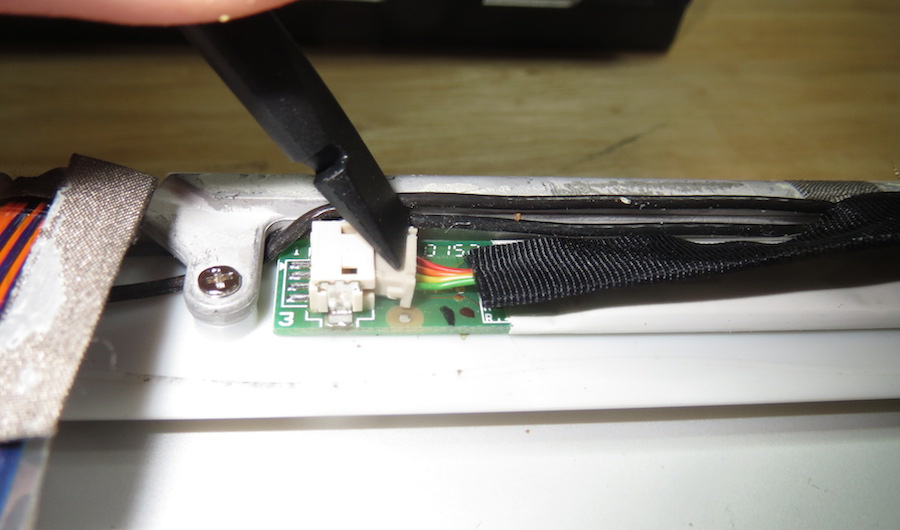
This connector is a tight connection, so don't pull one the wires. There is a ridge on the connector that can be used to gently pry the connector out of the socket with a spudger.
The inverter board is attached to the screen bezel with adhesive at each ends of the board. Slide a spudger under one side and gently separate the board from the bezel and then the other.
I ordered a replacement inverter board for under $15. On the back of the inverter board is the part number. For my G3 iBook, the part number is U04I065.00.
Peel off the tabs covering the adhesive on each end of the inverter board and press the board onto the bezel. Make sure that the inverter is oriented correctly adjacent to the correct connectors.
Connect each of the connectors on each end of the board.
Make sure the wires are placed correctly, so as to not be pinched. Place the shielding over the LCD and screw in the four screws to attach the shielding to the LCD. Put all the tape back in place. Make sure the tab is tape down to the shielding.
Snap the outer cover back into place and attach with the four screws.
Blown Inverter Fuse
If the LCD lamp is good and you can see wire through the cable wire's insulation, it is a good bet that the inverter fuse on the motherboard is blown. You can test to see if a current can flow through the fuse. If the inverter cable cause the fuse to be blown, the cable and the fuse should be replaced.
Again, it may not be worth the trouble to desolder and solder on a new microfuse. Since this laptop is a very old laptop, replacing the logic board is relatively inexpensive, if you do it yourself.
I have not had the opportunity to replace a laptop logic board, so here is an external link to the instructions for replacing the logic board a G3 iBook.